Roast chicken has recently become one of my favorite at-home meals to make since the lockdown ensued. Not only is it simple and easy to cook, but just a very small list of ingredients results in something entirely delectable. Once you get comfortable with the method of how to roast (and serve) a whole bird, you can play around with what goes into it. My go-to roast chicken is composed of just seven ingredients that most of us tend to have on hand to begin with. Meals like this exemplify why simplicity, when left to the hands of correct methodology, will beat overly complicated recipes any day of the week.
Let’s talk about my favorite cooking term to say aloud: spatchcock.
Spatchcocking is a method of butchery developed to cook virtually any piece of poultry. We have all been unlucky enough to come across a roast chicken or turkey in our day that was as dry as could be. This is because when roasting a bird whole, the breasts will always dry out before the legs and thighs are safe to consume. I made a pledge to myself two years ago that I would never roast a bird whole again the traditional way, and it is my best guess that any of you reading this will take a similar pledge in the future.
The Spatchcock Method
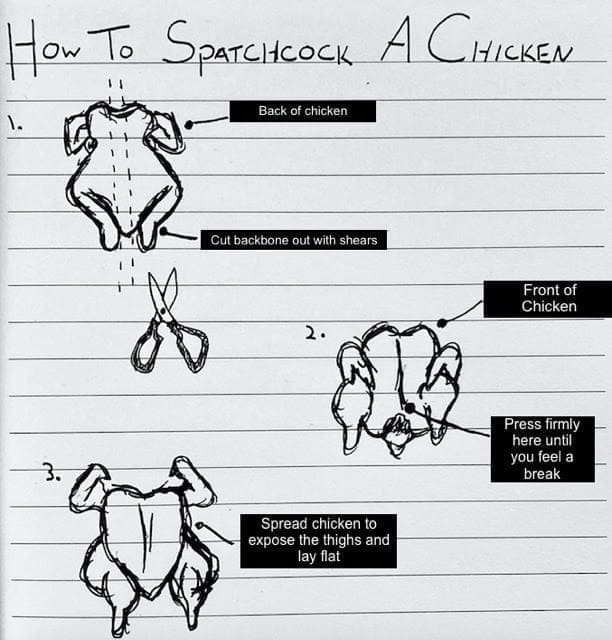
The spatchcock method simply refers to cutting the backbone out of any poultry so that it is able to be laid flat and roasted in one even layer. Not only does this cook the thigh and breast of the bird more evenly, but it does so in a fraction of the time. You simply take sturdy kitchen shears and cut away removing the spine of the chicken. It is easier than it sounds, and most high-quality butchers will do it for you if you do not feel up to the task. Perhaps my favorite part of this method is it allows you to use the backbone for stocks and soups in the future.

After butchery, I always season my poultry in advance and allow it to dry uncovered in the fridge overnight. This allows for salt to both penetrate the meat more deeply, and for moisture to be drawn out of the skin. The Maillard reaction refers to the browning of proteins due to a chemical reaction between amino acids and sugars in the meat. Simply put, it is what makes roasted meats and poultry taste so great.
Moisture is the antagonist in the story that is Maillard reaction, but by drying the bird overnight, we can avoid the conflict entirely. This alone is what I feel to be the most important aspect of this recipe. In fact, I developed this as more of a “method” rather than a strict recipe to follow. Want a little heat? Add some cayenne pepper to the mix. Want a touch of sweetness? Glaze the bird with honey during the final moments of cooking. Want both? Go for it. The options truly are endless, and a variation of this method is on my dinner table no less than once a week.
Cooking Instructions
Ingredients
- 1 2-3 lb whole chicken
- Salt to taste
- 1/2 stick of unsalted butter, cut in 1/4 inch slices
- 1 large carrot, rough cut
- 1 celery stalk, rough cut
- 1 large white onion, cut in fourths
- 1-2 cups chicken stock
- Water if needed
Equipment
- 1 stainless steel sauté pan (large enough to fit chicken), or any roasting tray
- Poultry shears
- Knife
- Cutting board

Method
- The night before, prepare chicken to roast by turning it over and cutting the backbone out with shears— save the bone for stock.
- Lay the chicken breast side up on a cutting board, and using the weight of your body, press down firmly on the breast bone until you hear a crack. You should be able to lay the chicken flat now.
- Tuck wing tips underneath the bird, or cut them off and save for stock.
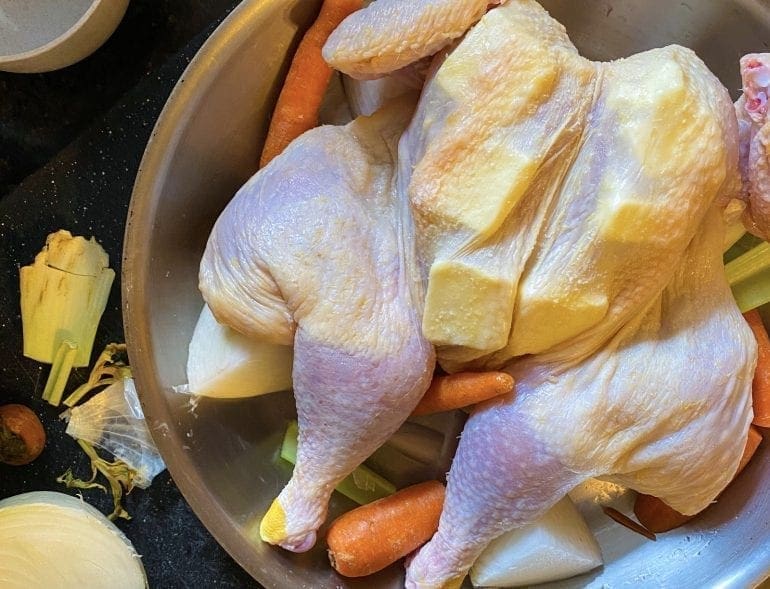
- Season chicken all over liberally with salt and place in the fridge uncovered overnight. (I place it directly in the pan I’m roasting in to save on dishes.)
- Next day, remove chicken from the fridge and place butter slices underneath the breast skin, being careful to not tear the skin.
- Place cut vegetables in the pan underneath the bird. This acts as both aromatic flavor, and a rack to get airflow both underneath and on top of the chicken.
- Place in a 450F oven uncovered and begin roasting.
- 25 minutes in, check the bird and rotate. If necessary, add water to the bottom of the pan to keep from butter burning, and to add steak to the cooking process. This will also allow for the pan sauce to be easier to make. Rotate bird occasionally, monitoring color.
- If after 30 minutes, the color is still quite light, crank the oven up to 500F to complete the browning process.
- If the chicken is browning unevenly, rotate and tent the dark portions lightly with foil. Do not cover the whole bird.
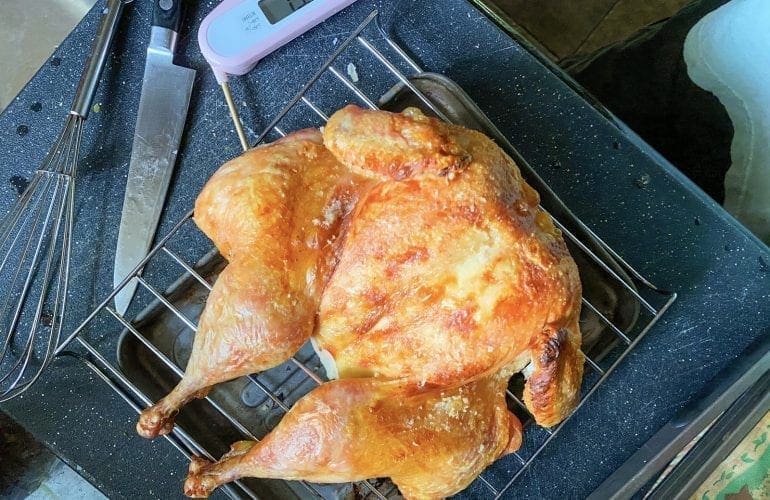
- When the breast registers 160° at the deepest part, you are safe to remove it from the oven.
- Place chicken on a wire rack to rest.

For Pan Sauce
- Bring the pan up to a boil on the stovetop and add chicken stock as needed.
- Reduce to desired consistency.
- Season and strain through fine-mesh strainer.
- Save vegetables for stock if desired.

To Serve
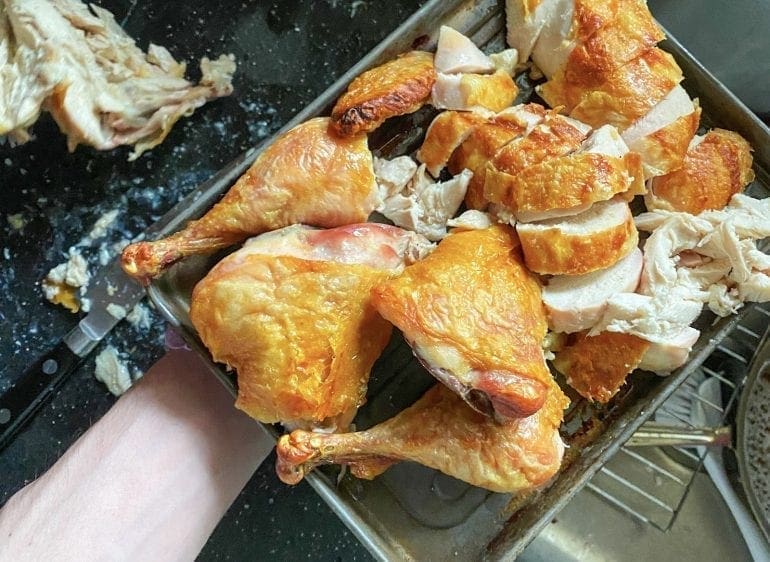
- Carve chicken separating both breasts from the carcass.
- Remove the whole thigh and drum from the carcass.
- Save all bones for stock if desired.
- Serve immediately with covered sides and pan sauce.
- One chicken serves 2-3.
Peter Candia is the Food + Drink Editor at New Jersey Digest. A graduate of The Culinary Institute of America, Peter found a passion for writing midway through school and never looked back. He is a former line cook, server and bartender at top-rated restaurants in the tri-state area. In addition to food, Peter enjoys politics, music, sports and anything New Jersey.
- Peter Candiahttps://thedigestonline.com/author/petercandia/
- Peter Candiahttps://thedigestonline.com/author/petercandia/
- Peter Candiahttps://thedigestonline.com/author/petercandia/
- Peter Candiahttps://thedigestonline.com/author/petercandia/


